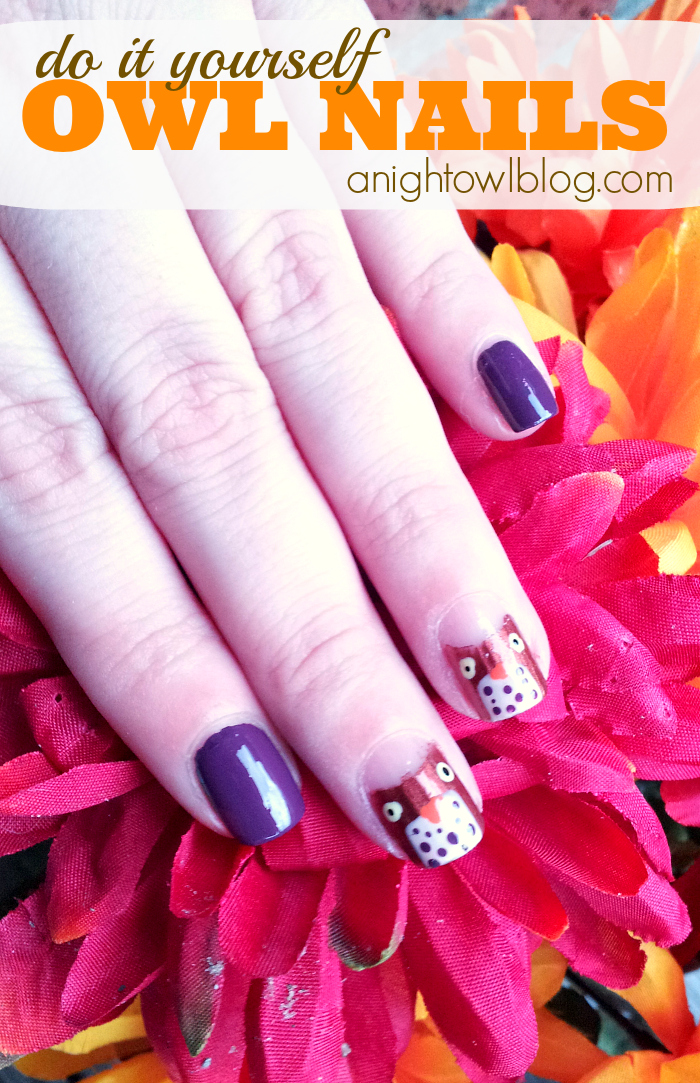
Hi Friends! The New Year is here! And what better way to celebrate a new year than with a quick, easy, and most importantly fun manicure? I wanted to do something special for y’all and since this is A Night Owl, I figured an owl nail tutorial would be absolutely perfect.
This owl nail art tutorial is so simple, that anyone can do it even if you have never attempted nail art before! You don’t even have to buy nail tools this can be done with your polish, a bobby pin and some reinforcement labels! Easy, right?
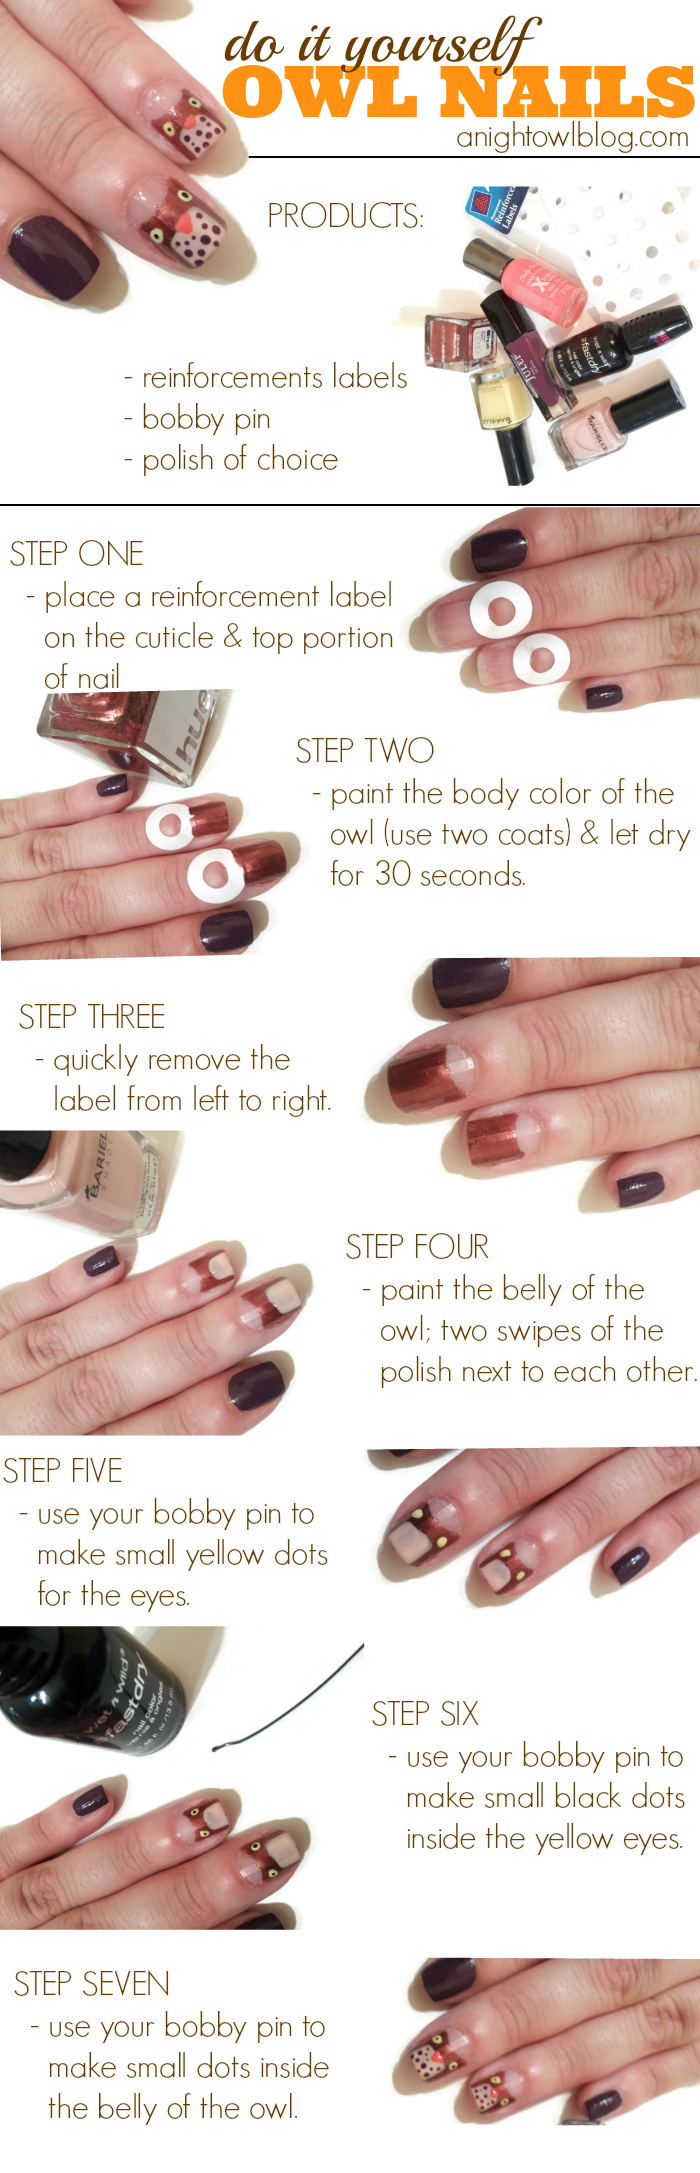
WHAT YOU NEED
- Nail Polish: 1 color for the body, 1 color for the belly, 2 colors for the eyes, 1 color for the nose, and 1 color for the dots in the belly. I’ll list the colors I used below but feel free to pick your own.
- Bobby Pin: This is going to be your nail “dotting” tool.
- Reinforcement Labels: These can be picked up at an office supply store or the paper section of most drugstores.
DIRECTIONS
STEP ONE: Place the reinforcement labels on the cuticle and top portion of your nail.
STEP TWO: Paint the body color of the owl (using two coats) and let dry for about 30 seconds.
STEP THREE: Quickly remove the label from left to right.
STEP FOUR: Paint the belly of the owl; two swipes of the polish right next to each other will get you what you need.
STEP FIVE: Use your bobby pin and dip it into the eye color that you have chosen for the nails and make small dots for the eyes.
STEP SIX: Use your bobby pin and a black polish to make smaller dots inside the yellow you have placed for the eyes. This will help them to stand out and actually look like eyes.
STEP SEVEN: Use your bobby pin and make small dots of the color you chose for your non-accent nails on the belly of the owl.
At this point, just pick your favorite top coat and go ahead and finish off your manicure and really make it shine.
COLORS USED:
– Black Polish: Ebony Hates Chris ‘Wet N Wild’
– Owl Body: Amber Lager ‘Hue’
– Owl Belly: Pillow Talk ‘Barielle’
– Owl Nose: Sun Kissed ‘Sally Hansen’
– Dots On The Owl & Non Accent Nails: Gayle ‘Julep’
– Owl Eyes: Banana Drop ‘Barielle’
I hope you love this easy and fun owl nail tutorial! Let us know if you decide to try it out and rock a cute accent nail for Fall.

linked up here, create & inspire, link party palooza, the 36th avenue, tidy mom
